My First Garden Journey
How I Built A Raised Bed Garden
How I Built A Raised Bed Garden
by Cathy Harris, June 14, 2017
5 days
14 days

30 Days

40 Days

50 Days
40 Days
50 Days
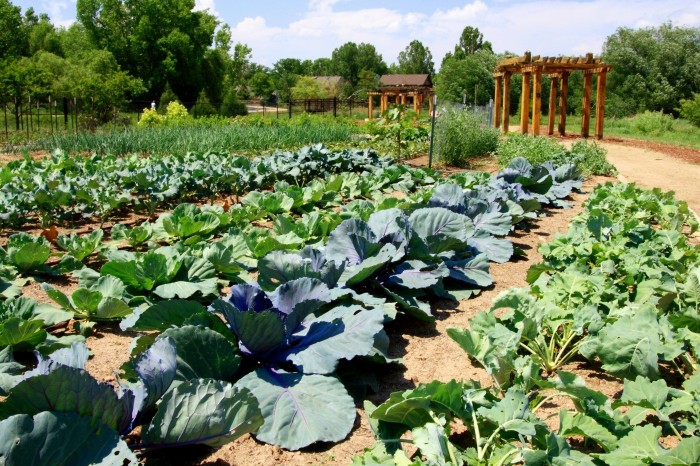
Growing our own foods is new to me, but I am up for the challenge. No...the picture above is not my garden. However, it looks identical to our garden when I was growing up. My garden so far - is the picture below, or that's how it initially looked when my mate and I got started with it.
Being raised on a farm, this is my first garden as an adult. At 60 years old, many people would probably be too embarrassed to admit that they are finally growing their first garden. However, it's especially Seniors today that need to start growing their own
 foods to make sure foods are safe to eat; to fight diseases; and to cut down on grocery bills, especially as they age.
Check out this picture from my first backyard raised bed garden. We found some plywood laying around and just put the garden together. The stick is propped under there until we can level the ground under the bed. Some people said the plywood might last anywhere from 2, to 5 or 10 years.
The dirt was hard clay and we did not want to go out and buy the right tools to dig up the garden, for instance, we could have rented a tiller from a garden center or bought a rake, but we took a short cut and used weed barrier paper to keep the weeds from growing up in the garden, once we leveled the ground.

We also have birds and rabbits so we will be investing in rabbit repellent or putting a fence around the raised bed garden -- probably a fence. For the birds, we already bought some bird scare tape, which is suppose to scare the birds away.
We did not bother to test the soil, since we knew that we would be dealing strictly with organic soils and organic seeds (or seedlings/transplants) in our raised bed garden.
My mate has a green thumb, and as far as I know I don't, but I have never tried growing anything so who knows, you might be able to develop a green thumb as you age. I am hoping so.
So follow us on our journey to grow our own foods. Just go out to your local garden center and get some pots or containers or get some untreated plywood and put together a raised bed 4 ft. by 8 ft. or just go to raisedbeds.com or Amazon.com and buy these raised beds that are easy to assemble.
Another reason that many people use raised beds besides being able to control the soil content, is to get more sunlight so when you are thinking about planting these beds, keep that in mind.
The reason that many people use the measurements 4 ft. by 8 ft. is that you can reach across the garden and get something. Also with raised beds, you have the opportunity to sit down on the edge while planting your foods or invest in something for your knees.
We officially starting planting this week (the middle of June 2017) and will be keeping a record of our journey, possibly for another book down the line entitled something like "My First Garden Journey - How I Got Back To Nature and Saved My Family and Community."
When you start planting in a raised bed, don't plant a whole bed of one thing because if pests get on your crops, they could eat the entire crop, but many times they will be after a certain food.
When you start planting in a raised bed, don't plant a whole bed of one thing because if pests get on your crops, they could eat the entire crop, but many times they will be after a certain food.
I am still a little confused on a lot of the information, but as I conduct more research, I become more confident. YouTube.com can be very helpful, however, it can be overwhelming too, but try to follow some of the timely and relevant shows that I have posted at my garden club "Cathy Harris Garden Club" www.CathyHarrisGardenClub.com.
Many gardeners on YouTube.com add coconut coir, peat moss, worm castings and other fertilizers to their soil to help the plants grow healthier or even faster, but as far as I know, organic soils have everything you need already in it, so all you have to do is add some type of fertilizer.

It's important to use your native soil in your area for raised beds to grow your foods. So I went to Austin Natural Gardeners for a class and looked at their organic soil and it was $28 a bag, "Happy Frog Soil Conditioner." With that size of raised bed (4 ft. by 8 ft.) you will need at least 8 to 10 bags to fill it, so that's a lot of money. So they sent
 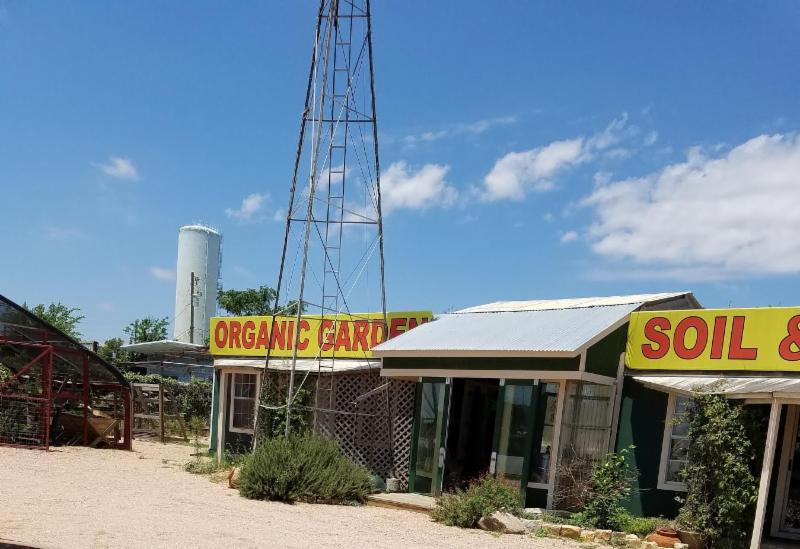 us to Austin GEO growers, who said we could bag our own organic soil for $4.65 a bag or
 just bring a truck and they would put the soil on a plastic tarp on the
  bed of the truck, and it would cost
their organic soil and it was $28 a bag, "Happy Frog Soil Conditioner." With that size of raised bed (4 ft. by 8 ft.) you will need at least 8 to 10 bags to fill it, so that's a lot of money. So they sent us to Austin GEO growers, who said we could bag our own organic soil for $4.65 a bag or just bring a truck and they would put the soil on a plastic tarp on the bed of the truck, and it would cost
$55.00. They will also deliver the soil. Either of these are good deals and of course we have a truck,
 after all we are in Texas, where everyone drives trucks.
 for our gardening project so we had to plan another trip to Geo Growers.
The 4' by 8' garden is about 12 inches deep and after leveling the garden with a shovel, before putting down the soil, we put down organic garden paper, to keep the weeds from coming back up, which is 100% biodegradable, which means the paper will eventually dissolve in the soil and allow the earth worms, amongst other ground creatures to come up and become a part of the soil. This is what you want to happen.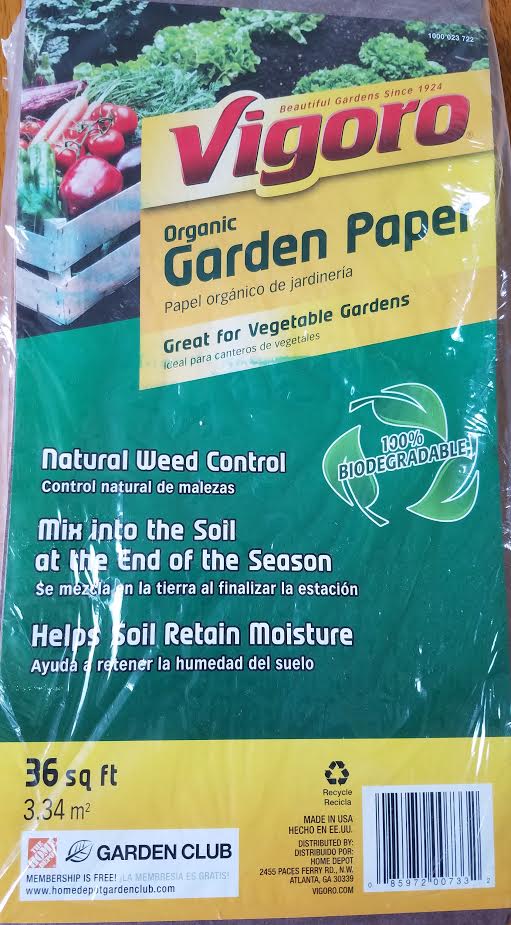
On YouTube.com many people use cardboard boxes to keep weeds from coming up in raised garden beds, but it contains glue and tape so again, we are trying to stay totally organic.
After putting down the organic garden paper, we went to Home Depot and bought 10 bags ($1.57 each at 10 bags = $15.70) 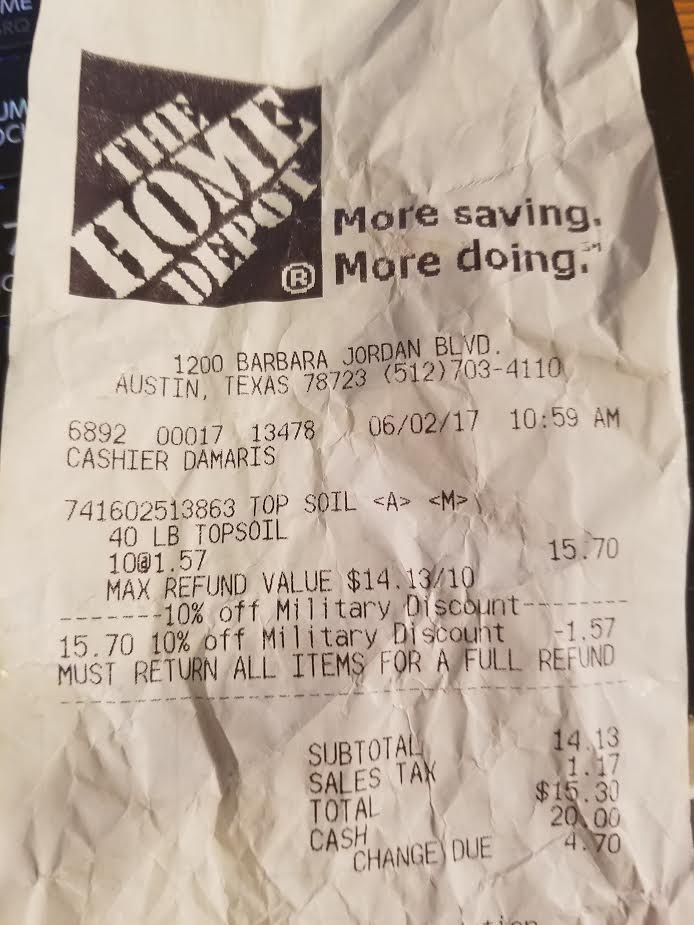 (40 lbs. total) of organic TOP SOIL to put down, which turned out to be about two inches throughout the 4' by 8' raised garden bed.
(40 lbs. total) of organic TOP SOIL to put down, which turned out to be about two inches throughout the 4' by 8' raised garden bed.
We did not really need to use Top Soil, but many people do use two different soils in their raised beds. Just make sure both are ORGANIC. We could have just used the organic soil from GEO growers throughout the bed and add a fertilizer before planting. We used the Happy Frog Tomato and Vegetable 7-4-5 Fertilizer on our raised bed.
but many people do use two different soils in their raised beds. Just make sure both are ORGANIC. We could have just used the organic soil from GEO growers throughout the bed and add a fertilizer before planting. We used the Happy Frog Tomato and Vegetable 7-4-5 Fertilizer on our raised bed. On our first trip to Geo Growers, we
 bought 8 bags for $39.84 so we had to go back and get another 8 bags. The bags were much smaller than I thought.
They also had thunderdirt for small trees, shrubs, native and xero scapeplants, double thunder, turf topper, geo tree mix, poultry compost, and  magic mulch, but we bought Thunder Garden soil for flowers, vegetables and raised beds.
magic mulch, but we bought Thunder Garden soil for flowers, vegetables and raised beds.
My mate was quite surprised and complimented me for finding the place. He does all the yard work, but when I got serious about growing our own foods, I was all over Austin trying to learn the process so this is a project that the both of us are working on together.
 After saying he did not want any foods growing in the house, I
  went downstairs the other day and saw that he had bought a tomatoe plant so looks like this is definitely rubbing off on him. He was preparing to plant the tomatoe plant in this big pot outside so I surprised him with several other smaller, organic tomatoe transplants (6 total at $1.69 each) that I bought after a class, to include in the large pot.
Couples have to agree to disagree on how and where to grow foods. This is not just for the betterment of the community, but it's especially for the betterment of the family. So hopefully couples can get on the same page when it comes to growing foods.
I am excited about growing my own foods and will report back to you guys with any progress. Since most of my foods that I eat for my blood type diet are the green leafy "nutrient-dense" greens, which grows in September (in colder weather), if for some reason the foods that I planted now are still growing, when I prepare to plant the crops for September, we might need to look at building our second raised bed - what a dilemma to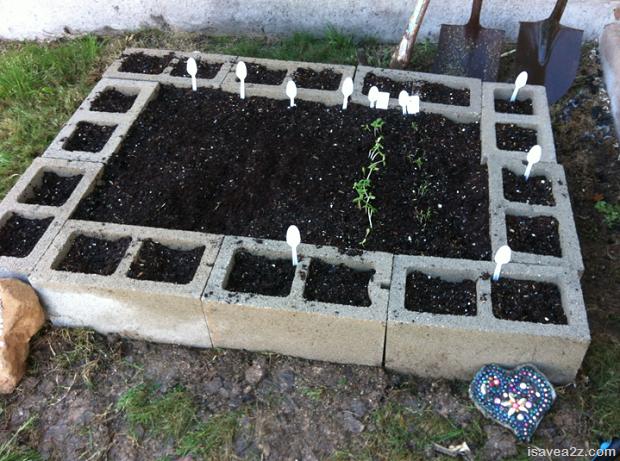 have.
have.
have.
I was surprised to see that my mate had went out and built a smaller raised bed garden made out of cinder blocks (sample garden on right), next to the other 4' by 8' raised bed garden made out of plywood, for the 7 tomatoe plants, instead of putting them in the big pot. You can actually build these raised bed gardens out of anything, so conduct your research.
Again, this is really rubbing off on him and many people are telling me that their neighbors are starting to grow foods, especially in raised beds, pots and containers -- simply because they are growing foods. So growing foods is contagious!
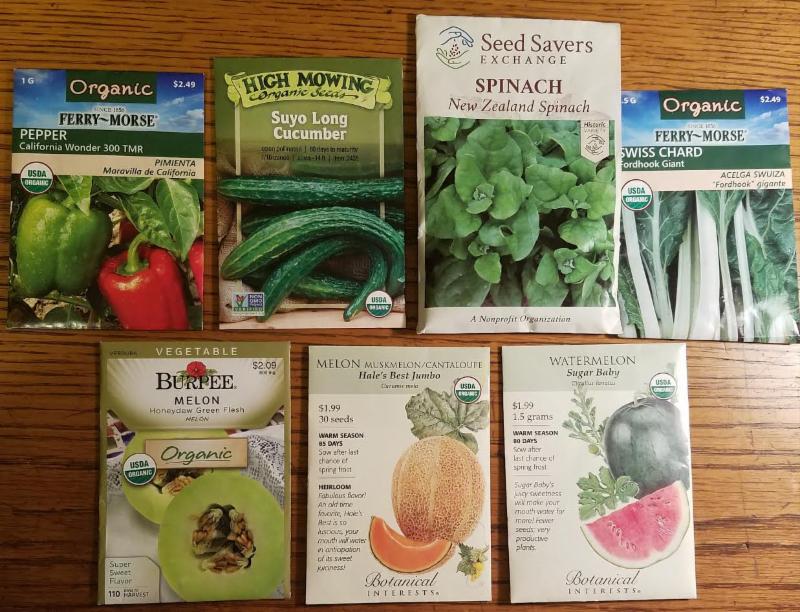 Packets of seeds only cost $1.99 to $3.99 with many seeds inside the packet, but make sure they are ORGANIC. And the back of the seed packets contains instructions on how to space the seeds (most said to space seeds 4 to 6 inches apart). Some seeds, like the New Zealand Spinach, you might have to soak for 24 hours before planting.
The goal is when starting out, you don't want to overwhelm yourself so we just planted on June 14, 2017 in our FIRST raised bed garden rows of honeydew melon, cantaloupe, watermelon, pepper, cucumber, New Zealand Spinach, and Swiss Chard.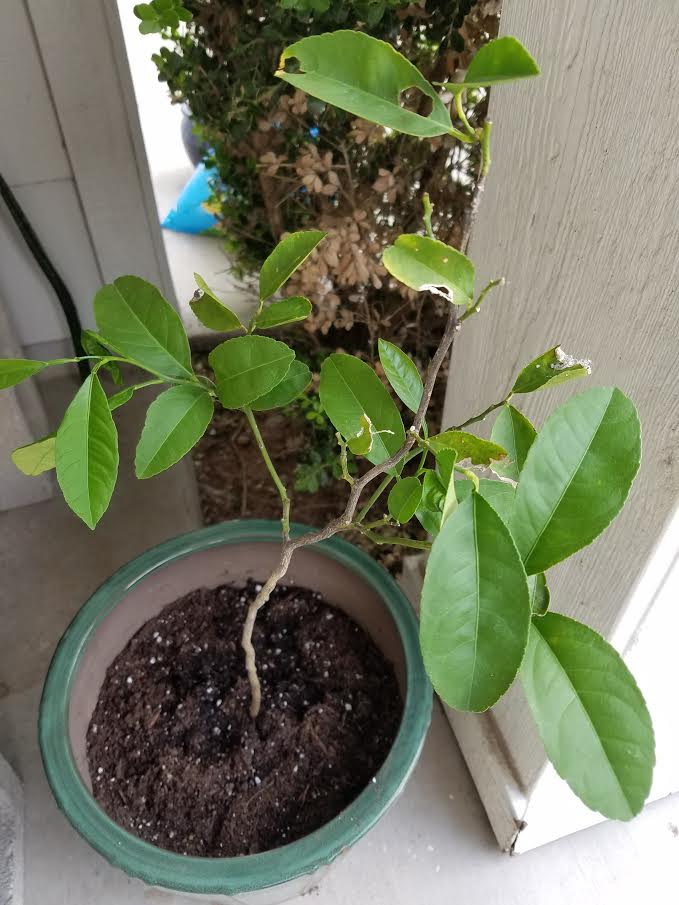 We also have 2 citrus
 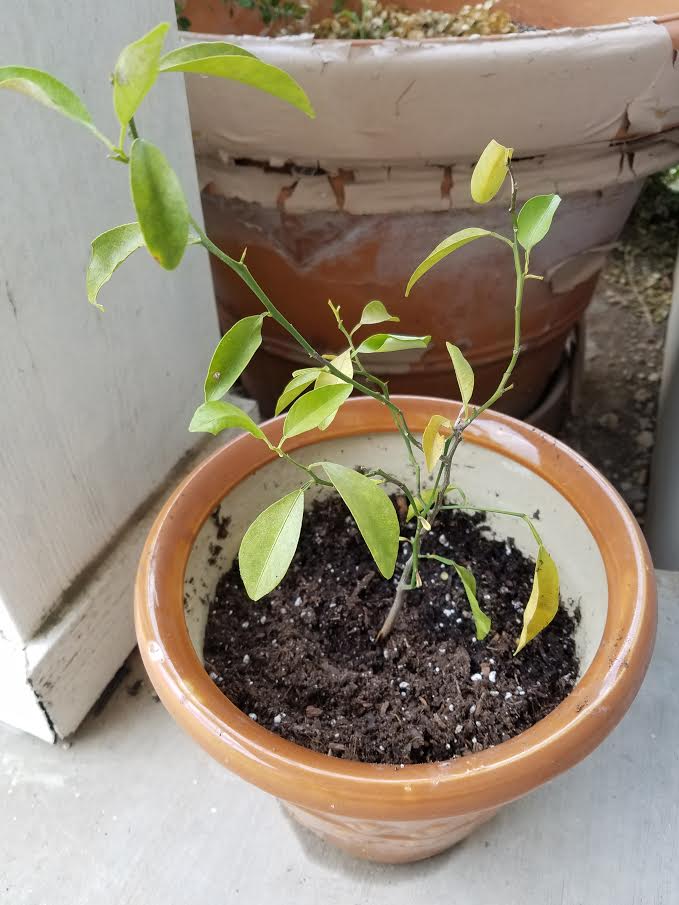 fruit trees (a lemon and tangerine tree) in pots on the back porch.
We also have 2 citrus fruit trees (a lemon and tangerine tree) in pots on the back porch.
I chose the foods (or seeds) because Natural Gardener recommended them for growing foods in June and they fitted my blood type diet.
The trainer in the class burst my bubble the other day when she told me that Austin has two SHORT growing seasons instead of two LONG growing seasons. I thought simply because we lived in a hot climate (hot and hotter), we could grow foods all year, but she said NO -- and that we would be lucky 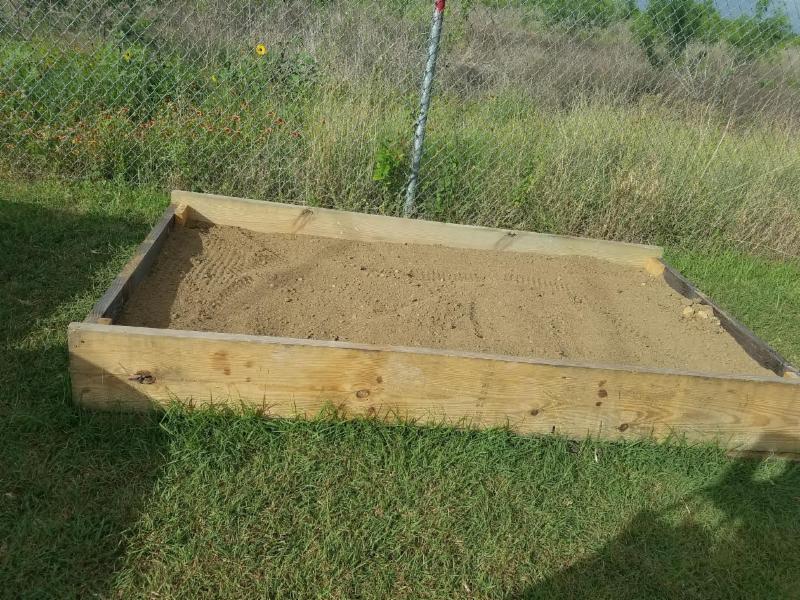 if the foods we plant don't bolt on us from the extremely hot temperatures. What an eye-opener! So if you live in a region with a "long-growing" season, like my last state, Georgia, you are so lucky...so take advantage of it.
if the foods we plant don't bolt on us from the extremely hot temperatures. What an eye-opener! So if you live in a region with a "long-growing" season, like my last state, Georgia, you are so lucky...so take advantage of it.
We finally had enough soil for the garden so this is how it looked before planting. So now all we need to do is sit back -- water it -- and watch it grow.
So the steps for our first raised bed garden included:
-Made the 4' by 8' raised bed out of plywood (another one out of cinder blocks).
-Leveled the ground with a shovel (but you can rent a tiller from a garden center or use a rake).
-Added biodegradable garden paper.
-Added Top Soil (2 inches across).
-Added Thunder Dirt from GEO Growers.
-Mixed in Fertilizer (Happy Frog Tomato and Vegetable 7-4-5 Fertilizer).
-Added seeds (Selected seeds for our region and the foods we were already eating)
-Water regularly and wait for garden to grow
-Eat good tasting, "nutrient dense" foods
-Live a long, healthy life while you grow foods that are safe to eat, fight diseases while you cut down on doctor's visits, cut down on grocery bills, etc.
-Get your family, friends, neighbors and colleagues to do the same, while you help build a "brain-healthy" community.
On the next "Virtual Organic Garden Clubs" series, I hope to educate you on container gardening, since I just finished up another class at Austin Natural Gardener on Tuesday on that topic.
I also spoke with a lady who was renting her home, who had 100 pots and containers so that is very encouraging so if you don't want to do a raised bed garden or get your soil tested and plant foods in the ground, just use pots and containers to grow your foods on porches, patios, balconies, rooftops, in kitchens, etc. -- again "the sky is the limit!"
The goal is to have fun growing your own foods and don't forget your new motto Self, Family and Community - in that order ONLY.
Cathy Harris, Speaker, Author, Coach
National Non-GMO Food Expert
Cathy Harris Garden Club
P.O. Box 19282
Austin, TX 78760
(512) 909-7365
cathy@cathyharrisinternational.com
Update - June 28, 2017

My First Garden Journey
After my mate added on his little raised bed garden made out of cinder blocks next to mine, this is what it now looks like. He is also thinking about growing foods in the slots on the cinder blocks, which is a great idea.
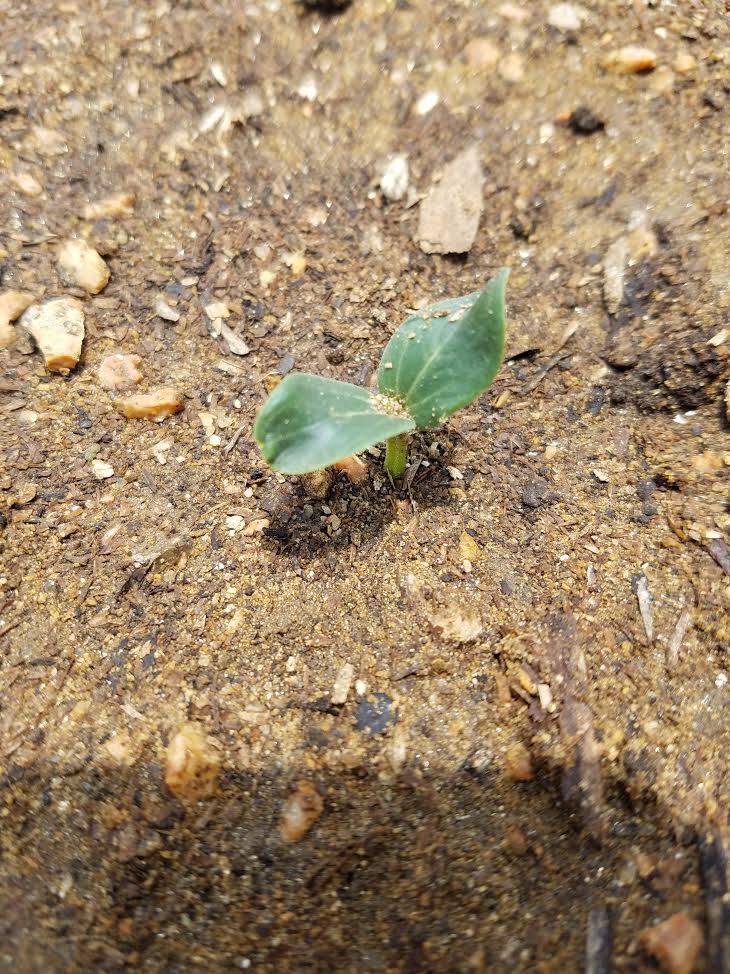
Last week we discussed how to grow foods in raised bed gardens, so go back and read my blog post on that topic. What I am happy to report is that in just 5 short days after planting the 8 foods, the foods started coming up as seedlings.
It was a very proud moment for my mate and I. We felt like we had become the proud grandparents of grandchildren. So everyday, once or twice a day, we go out back in our back yard to check on our progress. The big accomplishment will be having the foods on our plates to eat -- so we can't wait!
July 13, 2017/Update:
Hey everyone:
I feel pretty good about choosing to do a raised bed garden and plant my first crops on June 14, 2017. As I continue to attend local gardening classes, there has been two different instructors, a woman and man, teaching the classes, who are giving out great information for our area.
It's also great having a woman and man's different prospective on growing foods. Remember men and women never really think alike. One might do something totally different from the other because "Men are from Mars and Women are from Venus."
These classes are places where you can get all your gardening questions answered and as soon as I find out something, I will share it with you, my waiting audience, but it's extremely important to find out what's happening in your own zone and region and attend classes there -- so read the article - "10 Steps To Get Started Growing Your Own Foods."
The male instructor said it's best in Austin to do a raised bed garden because many people have thin soil, so it's best to do a 10 to 12 inch raised bed garden. Remember to ask at garden centers or local universities, which studies agriculture, how to get someone out to check your soil to see if you can grow foods directly in your soil, especially if you are not in a position to build these raised beds, buy these raised bed gardens or buy pots and containers to grow foods -- in and outside of your home.
He even said if you can, try not to use the weed barrier paperin your raised bed garden, but instead allow the earth worms to come up through the garden, unless you have a major problem with grass coming up.
We used the weed barrier, 100% biodegradable paper, which will dissolve overtime and so far we are satisfied that we haven't had a major grass issue in the garden, but it's only been 30 days. It might have been  worse, if we did not use the barrier paper so I think we will stick with the weed barrier paper in the future.
worse, if we did not use the barrier paper so I think we will stick with the weed barrier paper in the future.
In my book I talked about renting a tiller to prepare the area for raised beds, but the instructor said he uses a long handle pick ax, with a 2 and a half pound head, so this is a great idea that I will share with my mate. Last time he used a shovel and then went out and bought a hoe, so it's important to use the right tools when preparing your land for a raised bed garden.
The biggest thing to remember when you put up a raised bed garden is have access to water and use a well-draining soil that can hold water. It is also suggested that you water your raised bed garden earlier in the day, when the sun is out versus late in the evening, so the water won't be left to stand in the garden the entire night. If that happens, then you are risking issues with fungus.
30 Day Report Back
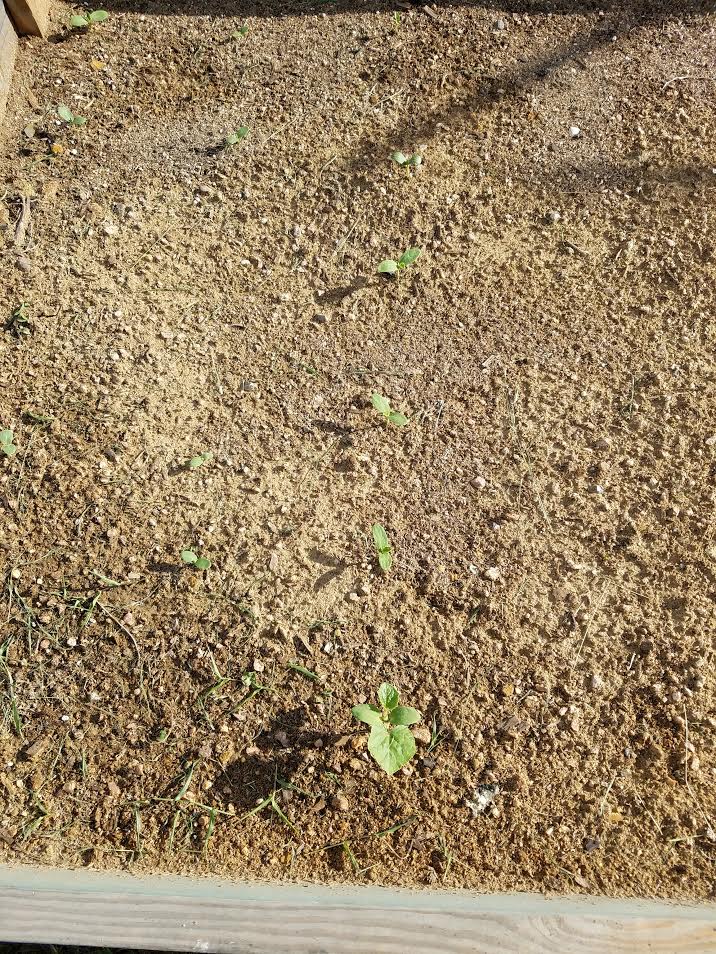
As you can see my first raised bed garden is coming
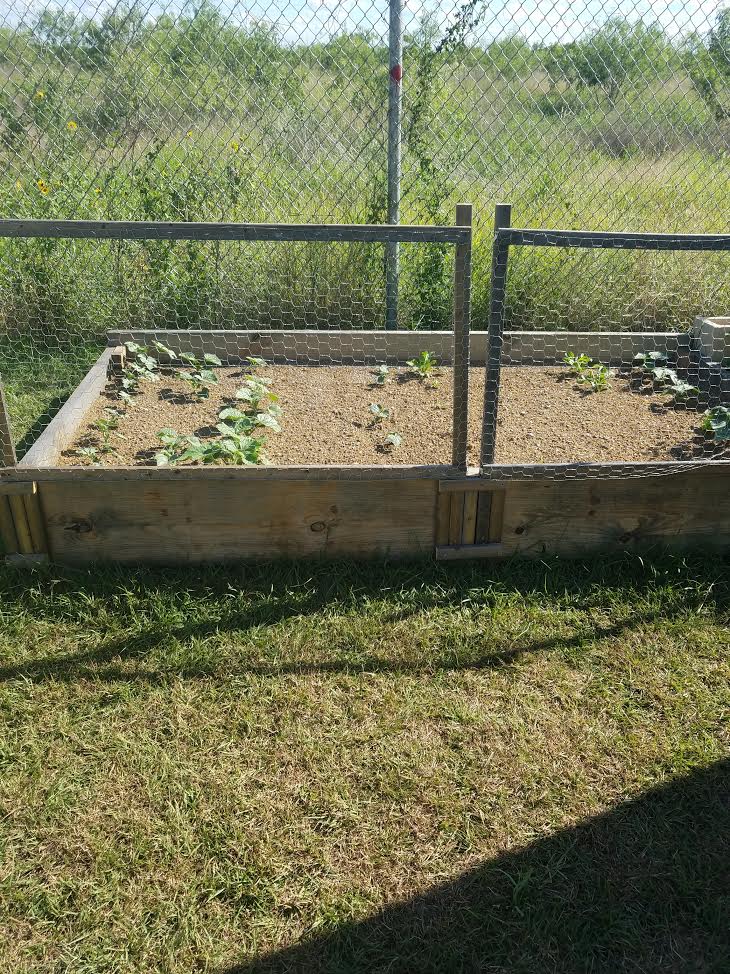 right along. It's now 30 days old. Can you believe it? Oh my God, my baby is growing up! Because a neighborhood dog ran across my garden last week, my mate has started putting up a fence around the garden, which you can lift up. I will show you more of how it will look once he finishes it.
My heart sunk when I saw the dog tracks in my raised bed garden. It was probably chasing a rabbit. We have fences on both sides and at the back of our backyard and there is usually nothing back there but rabbits and birds.
There is always something to do when you start gardening. It's more than just planting and watering the foods. But I am loving the experience and excitement. Even at 60, I feel like I am carrying a 6 lb baby (both my daughters weighed 6 lbs) again for 9 months. You have to do it to get the feeling...(ladies and gents)...so grow your foods today!
Since it doesn't look like any of the foods we planted on June 14, 2017 will be ready by September, when we get ready to plant our cooler weather crops, and mostly the foods that I eat, it looks like we will be building 2 to 3 more raised beds in our backyard. What a beautiful dilemma to have.
When I mentioned to my mate that it did not look like the crops will be ready by September, he said he already contemplatedthe idea of building several more raised beds. So we are certainly on the same page and again we both are enjoying our gardening project together.
As you see above on the 30 day picture, there is room for 2 to 3 more raised beds at the head of the raised bed garden so my mate said he will get rid of his cinder block garden and extend several more beds all the way to the big pot of tomatoes, which will put the food directly in the sunlight behind a shed we have out back. In September, it will still be burning hot here in Austin, so I hope
 the cold weather crops do okay.
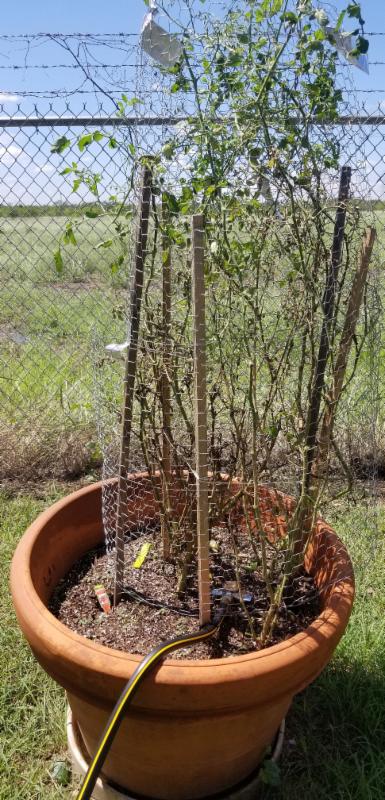
First Tomatoe Trellis
As you can see my mate made his first trellis for the tomatoes in the large pot, which is nothing but strings and sticks for now, but he will probably be doing more once they get bigger.
Tomatoes might need row covers or shade cloths if it gets extremely hot, especially over 90 degrees, but of course you won't need these in cooler climates. He said if you use mulch on your tomatoes, you can minimize fungal diseases. Pine straw mulch is good because it doesn't break down. I don't really know a lot about mulch, but I hope to learn more later on in my gardening journey.
Garden Critters
As I said in an early write-up we plan on using bird scare tapeto scare away any birds and we built the fence around the garden to keep rabbits (and dogs chasing rabbits) away.
Now my mate tells me, we might have rats that comes in from the fields out back so now I have to conduct research on what to do about that. My instructor said it might be cotton rats and stated that these rats have the ability to climb on top of chicken wire and other wire fences to get at foods.
 acting as a vector of scrub typhus and other infectious diseases.
I think they got me once and him several times and I haven't had time to conduct much research on these creatures yet, even though the welts that forms on the skin after a chigger bite may last for weeks.
However, I did find out that September is the month that the chiggers are most active in our area so it's been nice out at my garden so far, since I planted it in June in hot weather. It's been close to 100 degrees most days here in Austin, TX. Chiggers prefer a temperature in the 70s and lower 80s and become less active when the temperature soars over 90 degrees or falls under 60 degrees.
The instructor said sulphur can control chiggers. He said put sulphur in a sock then knock it against your socks because chiggers seems to congregate around tight areas like your socks or even a waistband. He said the best thing you can do is coverup.
Someone asked do chiggers get on dogs or cats? You know how much people love their animals and the answer is yes and it will cause severe itching. After working in the garden, you should wash these chiggers off you by washing your clothes or towels that you used to get the bugs off you with in hot water. Then treat your bites with an over-the-counter anti-itch cream or ointment, like menthol, calamine lotion, or hydrocortisone.
Because I wore pants and a uniform for many, many years, first with the U.S. Army, and then with the U.S. Customs Service, today I love to wear dresses with sandals because it is so hot here, but my mate has warned me not to go out to the garden in this manner because of the chiggers in Austin, so I definitely need to conduct more research on those little creatures.
I am very comfortable around the house wearing dresses so sometimes to take a break from the computer when I am writing articles and books, I might get up and run out back to the garden so I have to be more careful and especially get some snake repellent.
Growing up in rural Georgia, I know all about snakes. I also know that I don't like them either. My mate saw one a while back being chased across the backyard by birds. Good thing I was not in the area at the time because I am sure I would have had a fit.
I don't even know if I could kill a snake. Growing up in rural Georgia with 8 siblings, my brother Lewis, was the snake killerin the family. Everytime we saw a snake, we would yell his name "Leewwwwiiiissss" come quick, my siblings and I used to say. And he would grab a shovel, or hoe or gun and kill the snake.
My mate keeps all his tools looked up in the shed out back so if I see a snake, I will just run for the front or back door. As I start to conduct research on whether to buy snake pellets or snake powder as a snake repellent, I am finding out from YouTube.com and other sites, that some of these products don't work anyway. And you know me, I am looking for something that won't be toxic to our family.
I asked the instructor in our gardening class when is snake season in Austin and he responded in warm weather, however, if your area experiences a lot of rain like last year, snakes will be forced from their beds and maybe even into your front or backyards so families need to be careful.
He said there is a product called Dr. T's snake repelling granules that might work, which contains sulphur. He also said cedar oil (cedar, clove and cinnamon essential oil combination can keep snakes out of your yard -- Add 30 ml of cedar oil with 5 ml of clove oil, 5 ml of cinnamon oil and 2 cups of water to a spray bottle (increase mixture proportionately as needed)). However, do your own research and again, try to use something that's not toxic to your family.
Pests on Plants
Houston we have a problem. Three (3) weeks exactly after we built our first raised bed garden on June 14, 2017, my mate's smaller garden, that contains cantaloupes and tomatoes, had worms on the tomatoe plants, at least 2. The  worms were about a half of inch long and light green in color.
worms were about a half of inch long and light green in color.
Despite the fact that the tomatoes are growing and is the size of a pea, from my research, it said just pick off any worms found on them. I also mentioned this in the book that everyone should read "Overcoming Food Deserts in Your Community: How To Start A Home, School or Community Garden, Food Co-op or Food Coalition" so again the book will get you started with growing your foods.
Tomato horn worms can be a problem in many areas. These large caterpillarsshould be removed by hand whenever you see them. Also watch out for signs of blight (the rapid and extensive discoloration, wilting, and death of plant tissues), which is a real problem in many parts. Blight is a
large caterpillarsshould be removed by hand whenever you see them. Also watch out for signs of blight (the rapid and extensive discoloration, wilting, and death of plant tissues), which is a real problem in many parts. Blight is a
a plant disease, especially one caused by fungi such as mildews, rusts, and smuts.
Things you can do to keep these caterpillars away:
1) Handpick caterpillars from plants as you find them.
2) Dust plant foliage with Bacillus thuringiensis, or Bt powder. Bt is a natural bacteria that kills caterpillars, but it does not harm most beneficial insects. Make sure you dust the underside of the plants also. And spray this in the evening and it's not viable for long periods.
3) Spray the foliage of plants with neem oil. Neem oil controls caterpillars and other pests, including whiteflies, leaf miners and thrips. It may also kill beneficial insects such as bees and earthworms. Again, find out what pests are found in your zone or region so you will know how to deal with them when you spot them early on in your gardening project.
4) Invite birds and predatory insects into your garden. Hang a bird feeder to attract birds to the area. Ducks and chickens also enjoy eating caterpillars. If you garden lacks predatory insects, such as praying mantises, you can usually purchase a box of them from a garden center.
5) Surround seedlings with a rigid collar, such as toilet paper roll or plastic cup, to ward off cutworms.
6) Lay a sheet of cardboard or plywood on the ground near your plants. Check under the board every morning. Slugs like to hide under the board at night, making it easy to capture them.
7) Shield plants with sheets of polyester fabric full of pores. Row covers allow light to reach plants while keeping pests away.
8) Plant herbs and flowers around your garden to repel caterpillars. Many insects dislike the scent of lavender, mugwort, sage and peppermint. This is great to know because once I learn more about growing herbs, I really wanted to grow sage, which is extremely good for the human brain. It sharpens the mind.
9) Practice crop rotation to cut down on caterpillar infestation. For example, don't plant tomatoes in the same place two years in a row.
Leaffooted bugs are hard to get control of so try to control them as babies by using soapy water spray or ready-to-use insecticidal soap. Spray both sides of the leaves and the stems to ensure you kill all the nymphs feeding on the plants. Repeat every three or four days until you see no more nymphs.
A nymph is an immature form of an insect that does not change greatly as it grows, e.g., a dragonfly, mayfly, or locust.
Leaffooted bugs are medium to large sized insects that feed on fruits, fruiting vegetables, nuts, and ornamentals (a plant cultivated for decorative purposes). They have piercing-sucking mouth parts that allow them to feed on plant parts, particularly seeds.
Leaffooted bugs are in the family Coreidae and get their name from the small leaf-like enlargements found on the hind legs. There are three common species of leaffooted bugs that are native to California and the western United States. These
are native to California and the western United States. These
include Leptoglossus zonatus, L. clypealis, and L. occidentalis. Adults of all three species are about 0.75 to 1 inch long and have a narrow brown body. Adults of all three species are similar in appearance, except that:
- L. zonatus has two yellow spots just behind the head (on the pronotum).
- L. clypealis has a thorn-like projection called a clypeus that extends forward from the tip of the head.
- L. occidentalis has neither of these features.

There are numerous good bugs that will eat other bugs. When stink bugs feed on fruits like peaches or
 apples, they use their mouth to pierce the skin of the fruit. These plant-feeding
stink bugs can become serious pests in farms, orchards and gardens. A few species of stink bugs do not feed on plants. They are predators of insects that attack plants. Most wasps will eat caterpillars.
plants. They are predators of insects that attack plants. Most wasps will eat caterpillars.
Adding Fertilizer to Your Plants
Some people think once their garden starts producing seedlings and getting bigger, you no longer have to add any type of fertilizer to the soils to keep the foods growing faster and healthier -- but you do.
The male instructor said that potting soil and raised bed soils  DO NOT HAVE FERTILIZER, so you have to add it. You have to keep up this regimen throughout the life of your garden, especially if you want to produce the best fast-growing, healthy foods.
DO NOT HAVE FERTILIZER, so you have to add it. You have to keep up this regimen throughout the life of your garden, especially if you want to produce the best fast-growing, healthy foods.
So I will continue to use what we used initially on the garden, Smart Naturals Happy 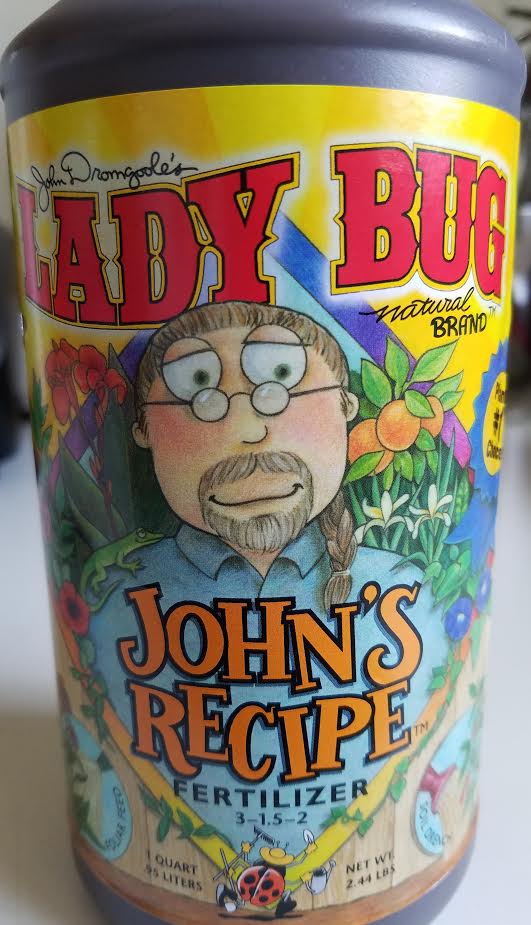 Frog Tomato and Vegetable Fertilizer, which is organic, once a month.
Frog Tomato and Vegetable Fertilizer, which is organic, once a month.
Because I know that the human body need probiotics to balance out the gut and that your health actually begins in the gut, I realized I wanted to get some type of probiotic to keep my foods growing in my raised bed garden.
In the last class, the instructor talked about having some type of liquid seaweed fertilizer or probiotic for the maintenance of your garden. He said seaweed is like a multi-vitamin for plants. Therefore, I decided to buy Lady Bug John's Recipe Fertilizer, which is a blend of both hydrolyzed and emulsified fish, seaweed, molasses, humate and Medina Soil Activator. You should use this every two weeks -- 1 tablespoon per 1 gallon water.
So between these two products, my raised bed garden should be set, until I have the foods on my plate. Even though Epsom Salt helps improve flower blooming and enhances a plant's green color and can even help plants grow bushier, the male gardening instructor said you can overdo Epsom Salt so be careful using it. I will just stick with the recommended fertilizers in the future. Again, growing foods are trial and error.
When I brought the two fertilizers home, my mate suggested that I did not need these because the garden was coming along nicely, however, I responded to him that maintenance is important and that he did not have to use these products on his garden, but I was going to use them on my raised bed garden and continue to use the fish fertilizer on my two potted citrus trees and any future foods I plant. So there will be disagreements from time to time, but you need to find your way back to agree to disagree.
Why You Need To Amend the Soil in Texas
What you need to realize is that in some areas, you need to amend, alter or modify the soil once you plant your foods, especially in raised bed gardens. Remember what I said before that the soil is the digestive system of the plant.
An analogy include:
- Compost is a veggie-filled salad with yogurt dressing with live and active cultures.
- Dry fertilizer is meat and potatoes.
- Liquid fertilizer is fish stew.
- Seaweed is a bourbon and water.
- Compost tea is a probiotic.
- Molasses is a probiotic booster.
- Mulch is a blanket that tucks everything in.
Texas soils, generally speaking, don't have enough organic matter or nitrogen. It gets baked out every summer and nitrogen gets used up and washed out by the flooding rains.
Foods Not Receiving Enough Sunlight
Veggies are the Olympians of crops, but they need full direct sunlight for up to 8 hours. Initially, when my mate put his smaller cinder block garden next to my raised bed garden, I stressed to him about the importance of my raised bed garden getting enough sunlight.
However, his tomatoe plants are growing so big that they are shadowing parts of my foods in my raised bed garden -- part of the day, so this might be problematic down the line. But for now instead of replanting the tomatoes to another area or even in a pot or container, we will provide a watchful eye.
The goal is never plant the taller crops in front of the crops that will see their shadow. My friend said because she has lots of trees and shade in her backyard, her plants are not doing very well because they are not receiving enough sunlight, so again, be careful of this.
What You Need To Know About Seeds
Before even looking at the plot of land or pots and containers to grow your foods, start collecting good, organic seeds. Supposedly, Monsanto owns over 90% of all seed companiesin the U.S. They approached all these smaller seed companies and offered thousands of dollars to buy them out and most sold out to Monsanto.
So check to see if there is a Seed Exchange Program in your city. Also check with local community gardens to see if they have some type of seed swapping program.
The gardening center said only a couple of growers are allowed to put 100% Certified Organic seeds on their packets because of USDA.gov and FDA.gov, who works with Monsanto to try to stop everyone from growing good, organic foods, so look for the seed packets that states the seeds are "100% Certified Organic" or "ORGANIC."
The goal is not to allow your seeds to dry out. Give them a deep soaking everyday with water and once they come up as seedlings, you want to back off. You can use soaker hoses, which are regular water hoses or drip irrigation. You can only use automatic sprinkler systems on dedicated water days, when you have a water shortage in your city, but this will not stop you from using drip irrigation.
When I was collecting my seeds for my June crop, I think a couple of the seeds were not organic. I thought most of the seeds at Austin Natural Gardener were organic, but that wasn't the case. However, the instructor said that their seeds comes from reputable seed dealers and not to worry about it, but this will be something I will pay more close attention to in the future, especially since the reasons for growing foods in the first place is to:
- Eat foods you know are safe or Non-GMOs.
- Homegrown foods taste better.
- To save money on your food bill.
- To keep down doctor's visits.
- It's better for the environment.
Growing Seasons in Your Zone or Region
Timing is Everything
 doing something. He has even decided to build a deck next to the shed so we can sit out back in the late evening in the shade by the garden. What a great idea!
Growing foods can be overwhelming for many people and comforting for others, but I am hoping these e-newsletters and blog posts really help you along on your gardening journey. I have received so many positive comments, especially from people in my city, and other cities, women and men, so again, everything happens for a reason. We can do this and have fun doing it so let's continue on a path of education for everyone.
Growing seasons here in Austin, TX, swing back and forth because of the rain, so it's not as stable as it is in other states. The instructor stated that the middle of the summer is not really a good growing season here, but my mate and I did not want to wait until fall or spring to start growing our foods, so hopefully everything turns out okay.
The gardening instructor stated that fall was great for growing good "nutrient-dense" leafy green vegetables so we want to be ready with more raised beds by September 1, 2017. Ideally I would like to have a raised bed just for growing flowers in the spring or summer to sell to farmer's markets. Women especially love to buy fresh flowers to put throughout their homes and some men love giving flowers to their special ladies so this is an exceptional business idea -- hint, hint...
Sweet potatoes, okra and black eyed-peas are good summer foods in my area, but you have to play the season by ear. Start off small, but be ready to expand when the need and feeling arise. Pick expensive foods that you currently purchase and start growing them first and of course, grow the foods your like, and make sure these foods have the highest nutritional value.
He said most of the transplants comes into their garden center around Valentine's Day, February 14, of each year. He also said you should start seeds in January inside of your home. It's best to start growing foods with organic seeds because a lot of transplants are planted in toxic soils so you want to avoid that.
Our Next Steps
Now that we have the garden out back by the side of the shed, my mate is always out back
doing something. He has even decided to build a deck next to the shed so we can sit out back in the late evening in the shade by the garden. What a great idea!
As you can see we have a large backyard and it doesn't make sense to go into your Golden Years cutting grass all the time (every 2 weeks in the summer) when you can just walk outside of your back door and pick your own foods from your garden, so who knows what type of plans we will come up with for our front and backyard.
and pick your own foods from your garden, so who knows what type of plans we will come up with for our front and backyard.
We are not a part of any homeowner's association so we can basically do what we want to in our area, as long as we keep it professional though and we do want to inspire our family, friends and neighbors to do the same. I am telling you this gardening project has taken a life of it's own. What a happy, happy feeling!
Please share this e-newsletter with everyone you know. Also send them to my garden club where all my articles will be posted and videos for your gardening project at "Cathy Harris Garden Club."
Love ya,
Host & Moderator, Cathy Harris
"The Cathy Harris Show"
Cathy Harris, Speaker, Author, Coach
Angels Press, CEO, President, Publisher
Former U.S. Customs Whistleblower
Austin, TX 78760
(512) 909-7365
www.CathyHarrisInternational. com
(Seminars, Workshops, Coaching)
www.CathyHarrisWebinars.com
(Webinars)
www.AngelsPress.com
(Empowerment & Publishing Company)
www.DearCathy.com
(Advice Columnist)
(512) 909-7365
www.CathyHarrisInternational. com
(Seminars, Workshops, Coaching)
www.CathyHarrisWebinars.com
(Webinars)
www.AngelsPress.com
(Empowerment & Publishing Company)
www.DearCathy.com
(Advice Columnist)
email: cathyharrisspeaks@gmail.com
50 Days
Fifty (50) days is about the time to start harvesting some of your crops, especially if you planted fast-growing vegetables. I discussed that topic in my book "Overcoming Food Deserts in Your Community: How To Start a Home, School, or Community Garden, Food Co-op or Food Coalition" - available as an e-book or paperback, so pick up a copy today (click here).
Vegetables which grows in 40 days or less include loose-leaf lettuce, mustard and spinach, as well as chives and radishes. Vegetables ready in 60 days or less include zucchini, summer squash, cucumbers, broccoli, peas, bush beans, kale, early cabbage, cauliflower, beets, turnips, kohlrabi, scallions, collards, kale, and Swiss chard.
This is a reminder of all the crops I planted in my FIRST raised bed gardenon June 14, 2017. So today I will be giving you a 50 day report back on the progress of each of the plants.
raised bed gardenon June 14, 2017. So today I will be giving you a 50 day report back on the progress of each of the plants.
We planted peppers, cucumbers, spinach, Swiss chard, honey dew melons, cataloupes, watermelons, tomatoes, a lemon and tangerine tree in a container.
 The tangerine tree did not make it. It's all my fault because I repotted it to a pot without a drainage hole and when I went to repot it again to a pot with a drainage hole, I did not handle the repotting with kids gloves and ended up violating the roots. Plus I needed to add more potting mix to the new pot, which I did not do, so this will be a lesson learned.
Also my mate had been going behind me giving my two trees in containers water, so it could have also died from overwatering. Since he felt the need to do this, I just put the care of the lemon tree in his hands, after all the raised bed was all mine, even though he was in charge of watering it.
 Well the 7 tomatoe plants that belong to my mate because I don't eat tomatoes, because of my blood type diet, did not fare well. I don't have to worry about the tomatoe plants blocking the sunlight off my crops because the crops are so big now and the tomatoe plant, which initially had the catepillars on it, died.
I believe the tomatoe plants died because of the high heat (over 100 degrees for 30  days in Austin, TX) and my mate refused to put a shade cloth on the tomatoe plants as suggested by the instructor in my gardening class.
days in Austin, TX) and my mate refused to put a shade cloth on the tomatoe plants as suggested by the instructor in my gardening class.
I believe another reason the tomatoe plants did not make it is because my mate used another soil on his cinder block garden and the big pot, which was different than what I used in the raised bed garden. So next time we will use the same dirt, Thunder Dirt, from GEO growers.
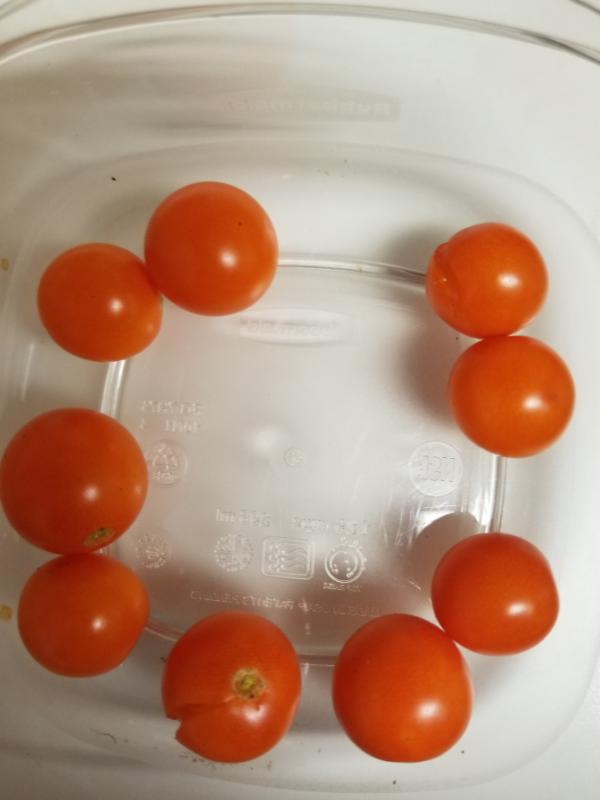
None of the 7 tomatoe plants containing 3 different types of tomatoes, did very well, but the cherry tomatoe  plant, which is supposed to grow well in the heat of summer is hanging on by a thread and still have some green tomatoes. In case the branch dies, we went ahead and tasted the tomatoes and they were good. It was actually the first food we tasted from our crops.
plant, which is supposed to grow well in the heat of summer is hanging on by a thread and still have some green tomatoes. In case the branch dies, we went ahead and tasted the tomatoes and they were good. It was actually the first food we tasted from our crops.
There were several more red cherry tomatoes, however, I believe the birds ate them. Even though we have the bird scare tape, my mate hasn't put it up yet.
cherry tomatoes, however, I believe the birds ate them. Even though we have the bird scare tape, my mate hasn't put it up yet.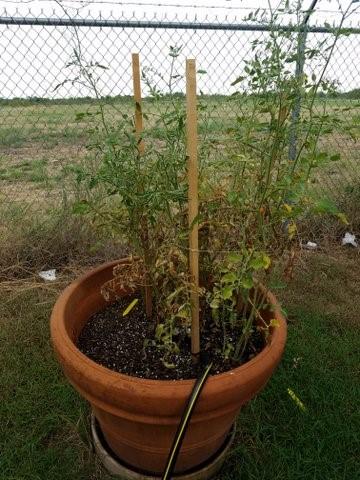 Next year we will plant the tomatoe plants in different locations also as suggested by the class instructor in order to keep down the chances of getting diseases on crops. And don't forget that most people get into gardening anyway in the first place because they look forward
  to growing tomatoes.
A healthy cherry tomatoe (which is the size of a cherry) plant would have looked like this picture. I also believe we planted the tomatoe plants too late in the season to gather a full bushel like we had hoped so we will plant tomatoes much earlier next year.
Honeydew Melon
 The honey dew melons are
  coming along after 50 days. So far there is a big one about the size of a cantaloupe that we should be able to put on our plates in a couple of weeks. It looks awesome and both my mate and I had this warm feeling that came upon us when we first found it hidden under all the vines. Wow what a thrill to see your hard work and have the pleasure of growing your own foods. I can't describe it! You actually have to do it yourself to get this feeling.
Cantaloupe
The cantaloupes are really looking awesome after 50 days. They are slightly bigger than a baseball and is still green. I love cantaloupes, but I will probably be traveling when they develop fully so I have to get my mate to describe the taste to me and hopefully we can freeze many of the vegetables until I get back in a few weeks.
Watermelon
 Our watermelons are about the size
 of a baseball after 50 daysand we have several ones, even though I planted 7 seeds total, so they are looking good and coming along.
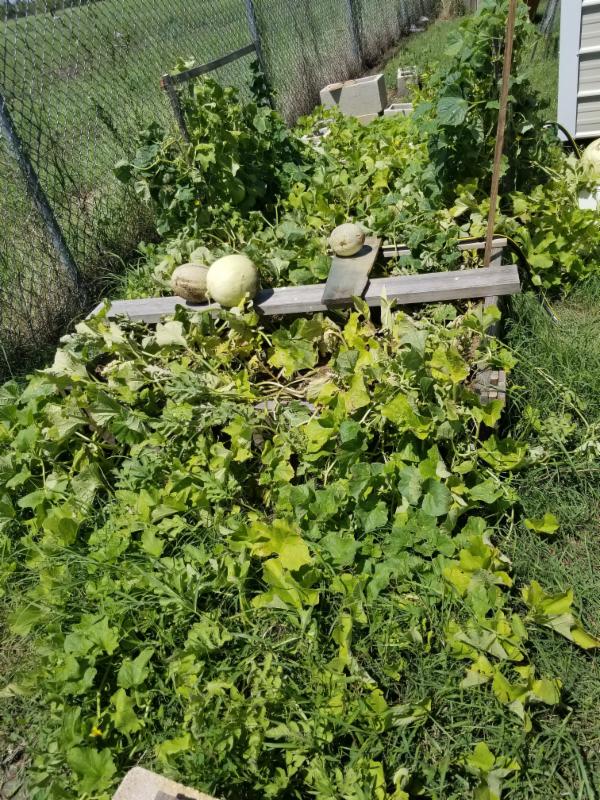
And as you can see the watermelon, cataloupe and honey dew melon vines are everywhere. I planted the watermelons at the very end of the raised bed garden, but now the branches have branched off out of the garden, so we are seeking ways to control the growth of the branches. Of course watermelons are too big to go on trellis like tomatoes.
Swiss Chard
 I planted Swiss Chard in two rows about 4 inches a part. The cataloupe, honey dew melon and watermelon vines have taken
 over the raised bed garden. I could barely see the Swiss Chard, but it is coming up nicely and looks like it is ready to pick and steam and eat. Supposedly, this is one of the foods you can cut off 2 inches from the root with a knife or sharp pair of garden scrissors and it should grow back. We will see!
Watering/Drip System
We had to go out of town for 7 days and visit family in 5 different states and this is when the watermelon, honeydew melon and cantaloupes vines took over the raised bed garden, so next time I hope to grow these 3 foods by themselves in one raised bed garden.
I was really worried that I would come back and all my crops would be dead, especially after the 100 degree weather for over 30 days here in Austin. We did not set up a drip system
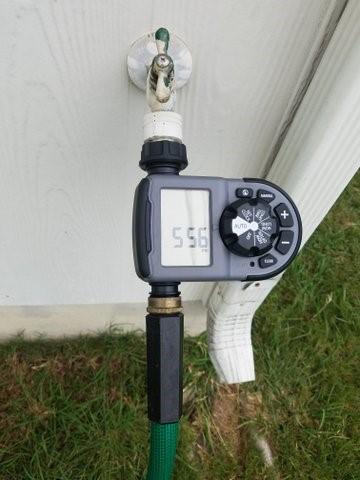 like most home owners or gardeners. Instead we (my mate) rigged a drip system using a sprinkler systemthat was on a timer and it worked great. Twice a day for 20 minutes, the raised bed
  garden, my mate's smaller cinder block garden and a big pot of tomatoes, received all the watering it needed. Now when we get ready to travel in the future, this definitely won't be something we will have to worry about. My mate did an awesome job!
He has now left everything hooked up so to water everything, all he has to do is just turn on the water. Again, this was a great idea, however, next time it might even be a better idea to plant a drip system in the soil, before planting the garden so we will investigate this idea. The ideas of how to run our garden have been endless.
I am continuing to monitor youtube.com to help you find great gardening videos to post at my gardening club "Cathy Harris Garden Club" (www.CathyHarrisGardenClub.com)
to help you get started gardening.
to help you get started gardening.
On that blog, you will also find all the articles I am writing. My upcoming book that I plan on writing in a couple of years is actually writing itself with all the blog posts. I will simply take the blog posts and put them into another non-fiction book. For instance something similar to "My First Gardening Journey: How To Grow Your Own Foods and Live an Energetic Life." This is a great way for anyone to write a book by starting with blog posts.
Update Sep. 28, 2017

60 Days
The End of My Test Gardening Journey: My First Gardening Journey: How I Built A Raised
Bed Garden
Sep. 28, 2017
Cathy Harris, National Non-GMO Health and Wellness Expert
On June 14, 2017, at 60 years old, my mate and I started a raised bed gardening journey. This journey was fully documented in my blog entitled "Back to Nature - What Are You Growing?" and my garden club at "Cathy Harris Garden Club"(www.CathyHarrisGardenClub.com ) entitled " My First Gardening Journey: How I Built A Raised Bed Garden."
Bed Garden."
After 90 days I am ending my FIRST
raised bed gardening journey to start my new or SECOND raised bed gardening journey for my winter crops.
I was initially warned from my gardening class instructor that since I chose to grow foods in June 2017, which was a very hot month in my region, Austin, TX, I would be lucky if anything came up at all, but I was so excited about the raised bed gardening project, that I could not wait until cool weather crop season in September/October, or to grow spring crops in March/April, to start this gardening journey.
However, overall we still got some great results and was able to walk everyone through the entire raised bed gardening process. I can't tell you what it has been like to be able to look out of the kitchen window of my own home and look at something we started from scratch - our own
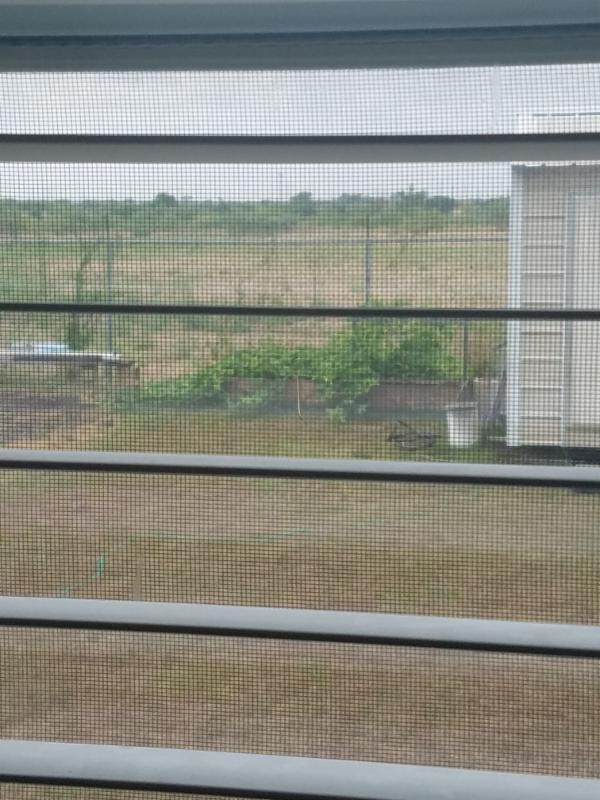 backyard, raised bed garden.
We can't bring this gardening project to an end without telling you first how successful it was. Remember, never let anyone define success for you, whether you are looking at your personal or business life. Success is in the eye of the beholder. Success is simply moving forward and accomplishing whatever it was you set out to accomplish...and that we did.
Again, I was raised on a farm and everything my 8 siblings, my mother and father and I ate came from the land. We knew no other way of living, so despite many people
siblings, my mother and father and I ate came from the land. We knew no other way of living, so despite many people
today making all kinds of excuses for not growing foods, I know first-handwe can get back to nature - to our roots - and start eating delicious, home-grown foods again.
First of all I am not going to tell you my journey was easy. It was hard work wiith many challenges, which taught us what to look out for in the future. Sure there were mistakes made by me and my mate, but we have owned up to them and will be using these mistakes as a guideline as we build even more raised bed gardens in the future.
Here Comes The Rats:
We initially planted watermelons, cataloupes, honeydew melons, New Zealand Spinach, Swiss Chard, cucumbers, peppers and because I wanted more green foods, we doubled up, which means we planted extra rows of the Swiss chard, cucumbers and peppers.
Besides a couple of caterpillars on a tomatoe plant that didn't survive, even though we picked the worms off, we really did not have a pest issue with our garden, until after about 60 days when Hurricane Harvey decided to hit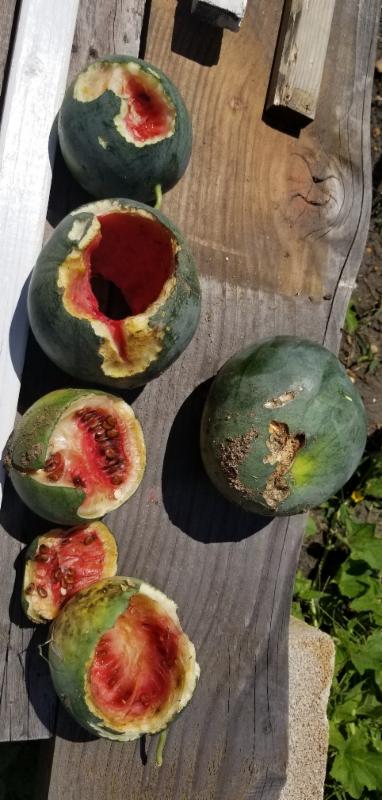 Houston, TX and brought 4 days of rain to my city, Austin, TX.
Houston, TX and brought 4 days of rain to my city, Austin, TX.
For those of you who will be growing foods in the future, during rains, especially floods, this is when snakes and rats are forced from their nests and beds in search of food, so this is exactly what happened to us.
Actually I was out of town for 10 days on speaking gigs, when this happened. Wh en I told my mate that I was on my way back for a couple of days, he did not volunteer to tell me until then that rats had gotten into our raised bed garden.
If I had been at home, I would have been checking everyday on the garden - rain or shine - but I think because of the rain, my mate did not inspect the garden like I would have.
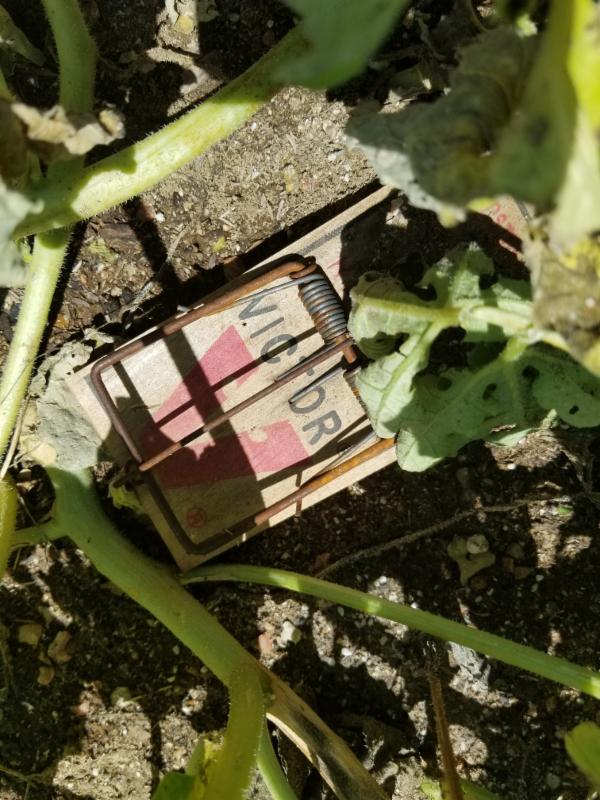 However, he tried to make amends and put down rat poison in boxes and he said the boxes are clean, which means the rats ate the poison so I am hoping that's the end of our rat problem.
The rats were big rats about 5 inches in length so they weren't the kind of rats that gets into homes, these were field rats. My mate even put down rat traps in the garden.
As you can see on the pictures, we stay next to a field, which was plowed up with a big tractor, a few weeks ago for the first time in 3 years. For days, buzzards were busy probably eating the rabbits
 and other animals that did not get out of the way in time. So until now we did not have a rat problem, but it is good that we had time to plant the garden and harvest many of the foods, before the rats came out.
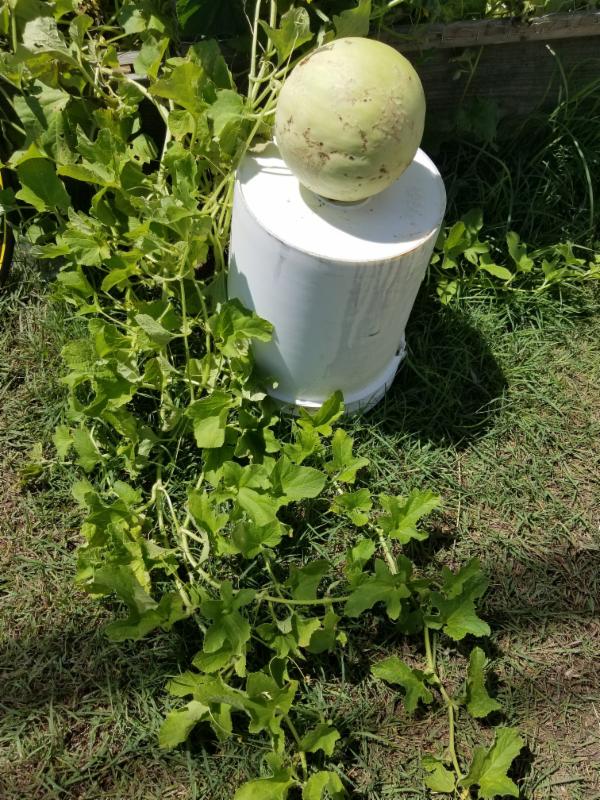
My mate feels since we allowed the watermelon, cantaloupes and honeydew melon vines to lay on the ground, versus putting them up on a trellis-like device, it served as a ladder for the rats to come into the garden.
So he made "make-shift" gadgets (put foods on planks, boards, and buckets) to lift the foods off the ground so the rats could not get to them, but you know as well as I do that rats are famous for climbing and squeezing into tight places.
Other Mistakes Included:
- Double-check Your Seed Packet Labels: I think I planted one of the crops with seeds that wasn't
 organic, but the class instructor who worked in the organic gardening center, where I bought the seeds, said all their seeds comes from reputable companies, so I felt better about this, but next time I need to see the word "organic" on the label. What I also found out is when seeds are not "organically certified," does not mean the seeds are not made of good quality. The company just might not have had the funds to take this process, so the company themselves, is reputable. This is good to know when buying seeds in the future, especially when you are buying the seeds from a REPUTABLE gardening center (not Home Depot or Lowe's). Many of the heirloom seeds that were passed down from generation to generation and is the best to buy for flavor, do not always have the word "organic" on them. Here is another explanation on the difference in "organic" and "heirloom" seeds.
 - Conduct More Research on Seed Spacing: You can see the Swiss Chard in the below picture that I almost planted too close together. Despite what the seed packets show on
 the label, some of these seeds need to be spread out more than 4 or 6 inches when planted. If you plant the foods too close together, it will stunt their growth. So conduct your research ahead of time before planting. Go on google.com and especially on YouTube.com and look at pictures and videos of how most farmers space their seeds out.
 - Be Careful Planting Fruits and Green Foods in Same Raised Bed Garden: We made another mistake by planting

 watermelons, cantaloupes and honeydew melons in the same raised bed as our green foods. After going on a one (1) week vacation, we came back to an out of control garden after the vines just took over the garden. Had we been at home to guide the vines in a particular direction, then we would have had more control over the garden.
 - Use the Right Type of Soil: In my mate smaller garden, he did not use the same Thunder Dirt from GEO Growers, as I did in the raised bed garden so I think this resulted in his cantaloupes taking 90 days to start growing, and it's a good chance they won't yield a harvest. Plus the
 seeds were from foods bought at a grocery store so we were just testing these seeds. My cantalopes grew from organic seeds and tasted great. So this goes to show you, you can have seeds that are no good, especially if they are not organic. The bottomline is it is not a good idea to try to save seeds from foods you buy in regular grocery stores, that are probably GMO seeds.
 - Use Fertilizer Every Two (2) Weeks: My mate
 refused to use the recommended fertilizers every two weeks on inside and outside plants as suggested by my
  class instructor, even though we used the good soil. He felt because the foods were growing well, we did not need the fertilizer and we were actually wasting money, but they would have grown even better, if we used the organic fertilizer every two weeks as recommended. The Happy Frog tomatoe and vegetable fertilizer can be used on veggies, tomatoe varieties, soft fruits and berries. It contains calcium which helps prevent blossom end rot and builds stronger cell walls, making plants more disease resistant. All the fertilizers feeds the soil and plant giving the plants a greater chance of survival, so it's important to use fertilizer, no matter what type of soil you use.
 - Use A Shade Cloth: You should wait to plant the foods in a cooler climate, if that is what is called for, or use a shade cloth, if it is still hot outside. The peppers and spinach never grew because spinach (and tomatoes) will not grow in over 80 degree weather. I learned that after
 planting the spinach. The pepper seeds were by Burpee and several people on YouTube.com said they had an issue with seeds from Burpee so I will avoid their seeds in the future. Also my mate refused to put a shade cloth on any of his 3 tomatoe plants (2 in raised bed and 1 in a pot), which can't grow in over 80% weather. During that time we had over 2 months of 100 degree weather in Austin, TX in 2017. So out of 3 types of tomatoes, only the cherry tomatoes, which are known to be able to withstand the heat - grew.
 - Be Careful When Repotting: I believe when I repotted the tangerine tree to a pot with a hole in it, to an unglazed clay pot, which was recommended, I destroyed some of the roots and that's why the tree died.
- Have All Materials Ready When You Plant: Have everything ready when you start planting, so you don't lose any of your crops. My mate planted a tomatoe plant in a large pot and
- Don't Harvest The Food Too Early: Harvesting food too early could be a real problem for first time gardeners. So many gardeners get impatient and many times, they are ready to plant more crops for another season so they will rush the process. But when you plant foods, you can't rush the process. Leave the foods alone until the frost comes in. We believe we picked or harvested
 some of the food too early, which resulted in the foods not being ripe. Just because the foods, especially the honeydew melons, were big for their size, did not mean it was ready
  to be harvested. You have to conduct your research by looking at foods in grocery stores, going on google.com and YouTube.com and looking at pictures and videos, to know when foods are ripe and ready to be harvested. You can also tell by the smell. Also because none of the honeydew melons ripened, there could have been other issues there so we will try them again next year. It's not a food that I eat anyway, but my mate eat these.
some of the cherry tomatoes survived, but we did not put out the bird scare tape or surround the plant with fencing soon enough because birds were able to eat some of the tomatoes. At the end of the season, we were left with a
 small batch, instead of what we had hoped for. After using the bird scare tape and placing fencing around the tomatoes, we were able to keep the birds out. N ext year we will try another tactic to grow more tomatoes.
What We Did Right:
- Get A Diagnosis on Plants: Don't be afraid to get a diagnosis on your plants. We go to the doctor for a check-up and we take our animals to animal doctors for check ups. I took a leaf from the lemon tree to the natural gardening center for a diagnosis and she said it was being overwatered. The lemon tree is doing well now.

 After my mate was going behind my back watering it, I just gave it to him to look after. It's been in the house most of the time and is growing quite well. Eventually though, it will need to be moved outside and repotted to a bigger pot or even planted in the ground. However, I am glad we don't have trees in our backyard, because at this point, the trees would be a hinderance with growing our foods because most of the foods, except for the cold weather crops, will need about 6 to 8 hours of sunlight everyday.
 - Use Good Soil: The fact that we chose to use the Thunder Dirt from
 GEO Growers in Austin, which contained many nutrients, gave the foods a fighting chance since we chose to start the garden in one of the hottest months of the year, June 2017.
 - Set Up A Water Drip or Irrigation System: The best step that we took was rigging a drip system using a sprinkler system (Orbit Hose Faucet
 Timer from HomeDepot.com), when we went out of town for a week. But hopefully in the future with any raised bed garden, we will install a drip system as soon as we apply the soil. But the good thing is, no matter how much foods we plant, we will still be able to plan trips out of town.
Taste of Heaven
Even though the peppers and spinach never came up along with some of the tomatoes, we had a "taste of heaven"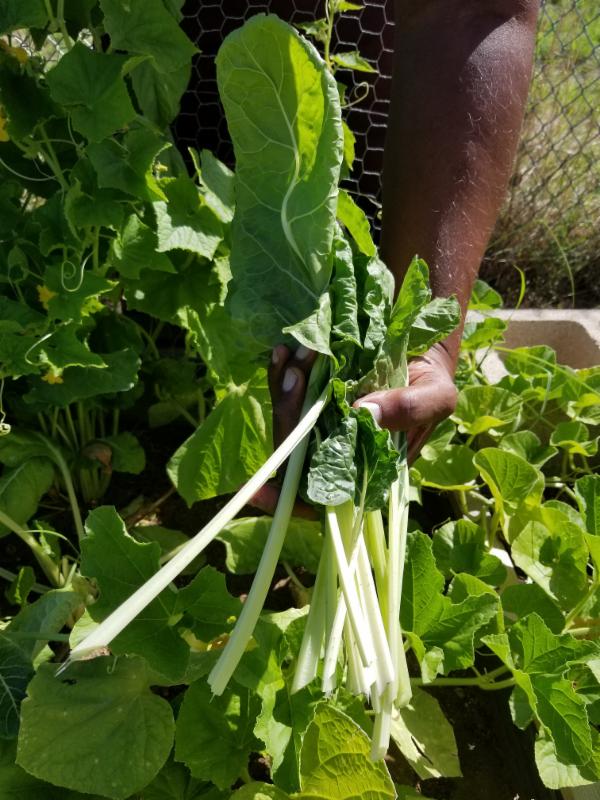 enjoying the other foods -the watermelons , cantaloupes , cherry tomatoes, cucumbers, and Swiss chard ( and watching the lemon tree
enjoying the other foods -the watermelons , cantaloupes , cherry tomatoes, cucumbers, and Swiss chard ( and watching the lemon tree
grow).
Also the Swiss chard is  continuing to come up along with the cucumbers until the frost sets in, even though we decided to clean the vines out of our garden. When I juiced Swiss chard and cucumbers for the first time, it tasted like a taste of heaven. Also when I
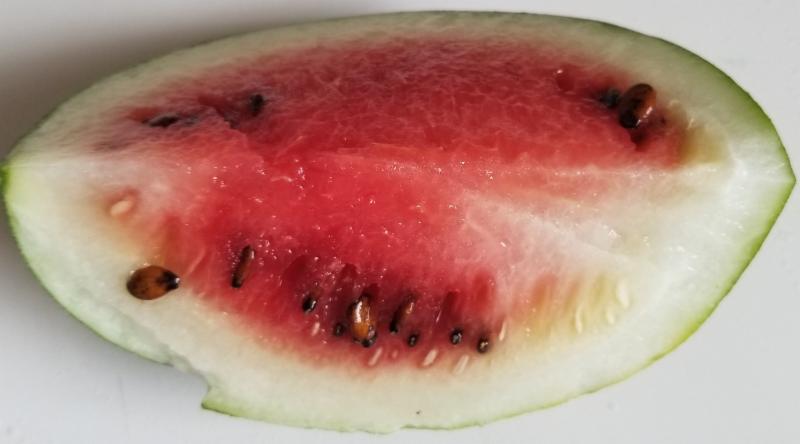 tasted the watermelons and cantaloupes, again it was like a taste of heaven and it
 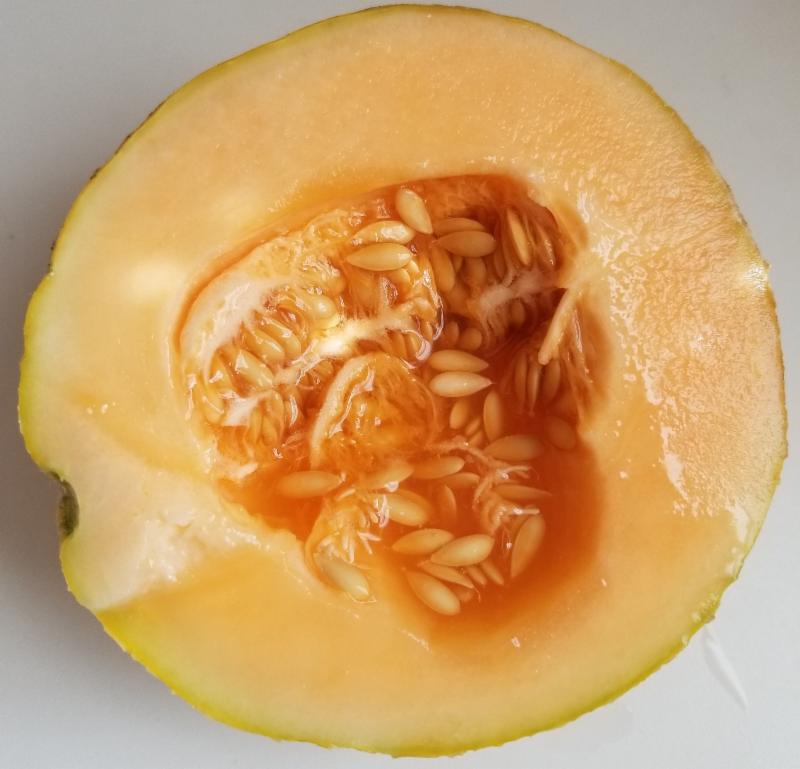 brought me back to my days growing up on our farm.
continuing to come up along with the cucumbers until the frost sets in, even though we decided to clean the vines out of our garden. When I juiced Swiss chard and cucumbers for the first time, it tasted like a taste of heaven. Also when Itasted the watermelons and cantaloupes, again it was like a taste of heaven and it brought me back to my days growing up on our farm.
For those of you who have never seriously stuck with a project in your life, you should really try what we just finished -- your own gardening journey.
It has now opened a door to a world of possibilities and opportunities, for instance, even better health, more gardens in the future and even more foods to give to family, friends, neighbors or even sell at farmer's markets and other venues.
more gardens in the future and even more foods to give to family, friends, neighbors or even sell at farmer's markets and other venues.
Next year we can't wait to plant some corn and potatoes. Corn, like tomatoes, is not on my blood type list, so I will only taste these foods, and my mate will eat them.
The green vegetable Swiss chard, doesn't block your iodine the same way that broccoli, cabbage and other green  cruciferous foods do, so next year I would like to plant more rows of Swiss chard, especially for juicing.
cruciferous foods do, so next year I would like to plant more rows of Swiss chard, especially for juicing.
Also when we plant watermelons, cantaloupes and honeydew melons in the future, we plan on giving them their own raised bed garden away from any green foods so when their vines grows out, they won't block or lay on top of other foods.
Why First-Time Gardeners Give Up
Whether you are growing foods in the ground in gardens, in raised bed gardens, farming using permaculture or aquaponics, or growing foods in pots and containers in or outside of your home, or using some other method of growing foods, only you can decide which is best for you. For us we plan on sticking with raised beds and growing foods in pots
  and containers.
gardens, in raised bed gardens, farming using permaculture or aquaponics, or growing foods in pots and containers in or outside of your home, or using some other method of growing foods, only you can decide which is best for you. For us we plan on sticking with raised beds and growing foods in pots and containers.
What is quitealarming is that over 40% of people choose not to garden after the first year, probably because:
- No Harvest: In many cases it's because their crops did not yield any harvest so they gave up. They probably did not conduct enough research in the first
 place. Gardening is just like starting a business, you got to have a mentor, where you can ask questions so you can avoid some of the critical mistakes.
 - Did Not Have Enough Space: Many backyards have too many trees, which provide shade, but if you grow foods in the ground or in raised bed
 gardens, you need 6 to 8 hours of sunlight, especially for summer crops. So everyone need to be strategic and then chose to grow foods at community gardens, or in pots or containers in or outside of your home. The goal is not to let the space issue, deter your dream of growing your own foods. Remember the story I told you about the lady that had over 100 pots and containers because she was renting.
 - Had To Travel: Many people might be gardeners, but might love to travel or have to leave for emergency trips and might not have others to
 care for their gardens. This is why it's important to have your own drip or irrigation system. And this is something you need to plan for from the very beginning of deciding to become gardeners.
 - Too Much Work: Many new gardeners found gardening to be hard work. I am sure many
 people got involved and had no idea how much work it would be, especially when they had to monitor and water the garden on a daily basis.
 - Waited Too Late: For many it was too late to try
 to use gardening to improve their health, so they had to stop because of their health.
Don't let any of the above reasons keep you from becoming a gardener or even starting your own farm. I can't see myself giving up, not this early in the game, especially now that I know beyond a shadow of a doubt, that I now have a "green thumb."
becoming a gardener or even starting your own farm. I can't see myself giving up, not this early in the game, especially now that I know beyond a shadow of a doubt, that I now have a "green thumb."
Green thumb gardeners are not always born with green thumbs. They develop these by attending gardening classes, joining gardening groups and conducting research, especially online on google.com and YouTube.com, the two largest search websites on the internet.
So what's going to be your excuse for not growing foods? Remember again, most people grow foods because:

- Organic home-grown foods taste better.
- Organically home-grown foods have more nutrition so it will improve your health and keep down doctor's visits, by ensuring that you are not eating foods with chemicals.
- You can save money by growing your own foods.
- Growing home grown foods is better for the environment. It prevents soil erosion, protects water quality of ground water, saves energy, reduces pollution, filters out carbon dioxide, while supplying fresh oxygen.
How Will You Stay Motivated To Keep Growing Foods
Most of you saw first-hand in my gardening journey, what I did to stay motivated and to become a successful gardener such as:
- Got Family Involved: If you truly want to get
 motivated and stay motivated while growing foods, get others around you involved. Many relationships slow down after a while, especially for Seniors, so you really need something to enjoy together like gardening. You can also do this with other family members, friends and neighbors by inviting them to visit your backyard gardens, farms, community gardens, and join food co-ops and food coalitions.
 - Attended Gardening Classes/Got Mentor: I not
 only attended regular, local natural gardening center, weekly or bi-monthly meetings and classes, the instructors there, both a man and woman, served as my mentor. I constantly asked them questions on the things I did not understand.
 - Started My Own Garden Club: I started my own garden club "Cathy Harris Garden Clubs"(www.CathyHarrisGardenClub.com) online. I started my own gardening club online and laid
 out every stepaspiring gardeners could take by writing articles and selecting quality videos. Next year I hope to bring the garden club in my local community.
 - Released a New Book: I launched an entire food growing campaign around the release of my book "Overcoming Food Deserts in Your Community: How To Start a Home, School or Community Garden, Food Co-op and Food Coalition," with a motivational book trailer on social media.
- Created A National Movement: I created a new
 national movement around growing your own foods by launching a gardening club movement at "Virtual Organic Garden Clubs (www.VirtualOrganicGardenClubs.com). Not only did I motivate aspiring local gardeners, but I took my campaign on a national and international level by educating my online community.
 - Launched National Masterminds: I started my
 own monthly Mastermind, Think Tank and Classroom meetings around growing foods.
 - Launched A National Tour: As a Speaker, Author, and Coach, I launched a national tour "The Cathy Harris Tour," around the release of my book and national food campaign, and
 went to 8 cities. In many of the cities I met with local movers and shakers to see what was happening. Many were excited about growing their own foods and was preparing to start their gardening journey. I believe many will be ready by Spring 2018.
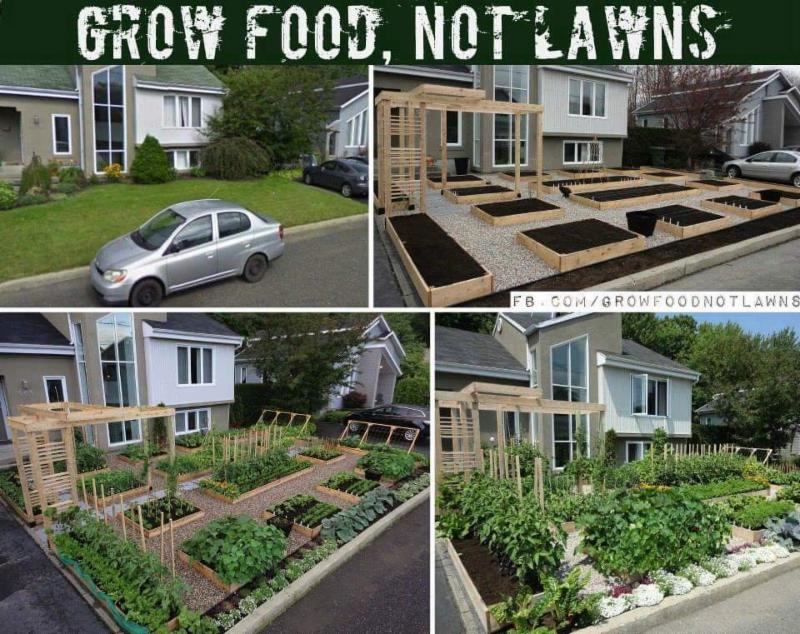 What was so unfortunate though, as I went around the country on tour, I can't tell you how many people I watched with these manicured lawns, yet they could barely walk to the mailbox to get their mail, because they were so sick and unhealthy.
For the past 90 days, my network and I have provided 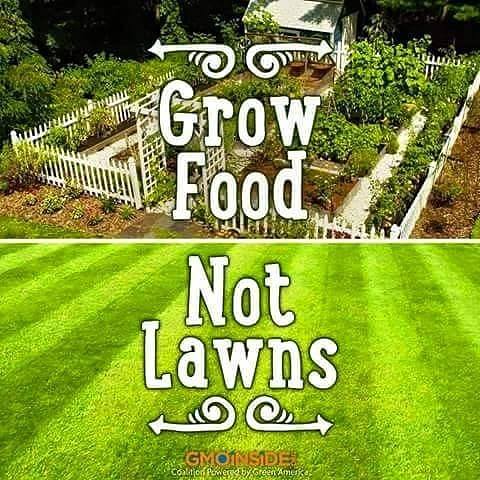 some great information for you, your family and your entire community, to be able to start growing your own foods, however, I still advise you to buy my book
some great information for you, your family and your entire community, to be able to start growing your own foods, however, I still advise you to buy my book
"Overcoming Food Deserts in Your Community: How To Start A Home, School, Community Garden, Food Co-ops and Food Coalition" and read it from cover to cover to fully get started with your own gardening journey.
 Information is not only power, but it's only power when you put it to use. The first raised bed that I planted on June 14, 2017, will continue to grow until the frost hits and now we have made more room in it for even more winter crops to plant.
The goal is to inspire others to get started with their gardening journey. My daughter is looking at starting your own gardening journey once she obtains more info from her region. She is already growing different plants and peppers in pots and containers on her back porch. I am so proud of her -- "Go TeamEssentialWomen.com !!!

Even though this journey ends myFIRST raised bed gardening project, I will still continuewriting articles andselecting quality videos on how to grow foods for my blog at "Cathy Harris Garden Club." I will continue to keep everyone motivated through our food movement
"Virtual Organic Garden Clubs"  and our women's movement"The Essential Women's Movement for African American Women," which started it all.
and our women's movement"The Essential Women's Movement for African American Women," which started it all.
I will inform you on the progress of future gardening projects and will seriously get started on my new book entitled "My First Gardening Journey: How I Built A Raised Bed Garden and Invited  Others Along for the Ride."
Others Along for the Ride."  P eople need the book. They need the encouragement and motivation that it will bring, especially with the
  campaign that I will launched around the release of the new book.
Our younger generation need to know that if a 60 year old senior, like myself, can write a book and launched a local, national and international gardening campaign and movement and inspire a whole nation of individuals, then they can also do the same!!!
Love you all...
Cathy Harris, Speaker, Author, Coach
Angels Press, CEO, President, Publisher
National Non-GMO Health Movement
P.O. Box 19282
Austin, TX 78760
(512) 909-7365
(Seminars, Workshops, Coaching) (Webinars)
(Empowerment & Publishing Company)
(Advice Columnist)
email: cathyharrisspeaks@gmail.com
askcathyharris@yahoo.com
Our Food Campaign


Mastermind Meetings
Mastermind, Think Tank, & Classroom Meeting
Sep. 19, 2017 - 60 minutes.
Mastermind, Think Tank, & Classroom Meeting
Aug. 15, 2017 - 90 minutes.
Mastermind, Think Tank, Classroom Meeting
July 18, 2017 - 60 minutes.
https://fccdl.in/OHkXWhzLdYouTube.com

Read These Blog Posts and Get Ready
To Grow Your Foods

How To Use Pots and Containers
To Grow Foods

10 Steps To Growing Your Own Foods

What You Need To Know About
Roadside Vendors Today

“The Beauty and Barber Shop (or Storefront) Initiative”
Wonderful post. your post is very well written and unique. Thank you for sharing this post here. modular garden beds
ReplyDeleteare made from polyethylene, PVC and polypropylene materials. PVC tarps are mostly used as truck covers while the tarps made from polyethylene and polypropylene are used for grain bunker covers and large shelters. These Tarps are available in different sizes and weights which makes them flexible to use in different conditions.
ReplyDelete나주출장샵
목포출장샵
순천출장샵
여수출장샵
익산출장샵
정읍출장샵
The writing style of this article was captivating. It kept me hooked from start to finish. Well done!
ReplyDeletetarpaulin sheet
Excellent article sir very nice information...
ReplyDeletegarden netting
Clearly, It is an engaging article for us which you have provided here about Irrigation companies PerrysburgThis is a great resource to enhance knowledge about it. Thank you.
ReplyDelete